Seven easy steps to healthy and colourful summer salads

The Swindian

Over the last few weeks, London has definitely had its share of gorgeously sunny and hot days, and I’ve been enjoying this to the utmost – queuing at Wimbledon, walking in the park, exercising outdoors, and using the opportunity to eat healthy and enjoy it more than usual.

A Wimbledon picnic whilst queuing to see Federer

With some days being too hot to cook a hot meal, I’ve joined the trend of healthy ‘bowls’. I’m not sure why they’re called ‘bowls’… when I make a stir-fry, I don’t call it a ‘plate’, so I’m just calling these healthy and colourful summer salads! They’re delicious, nutritious, and best of all, quite fun to arrange. They’re also endlessly versatile, so I never make them the same way twice. And depending on what you like and dislike, you can do the same! They can be vegan, vegetarian, pescatarian, or carnivorous, and the bright…

View original post 356 more words

The Painted Heron – Indian al fresco in Chelsea

What a culinary delight this blog is! I could almost taste each mouthful.

The Swindian

If you look at my restaurant map of London, you will notice that I largely tend to stay around Soho. It has an abundance of amazing restaurants, it’s easy to get to from everywhere, and importantly, it’s quick to get home in the evenings. It takes a good reasonto make me stray from the familiar, but the menu for The Painted Heron wasjust that. And whilst it did take me two hours to get home afterwards (I love London, but I hate TFL!), the experience was nonetheless pretty special.

OLYMPUS DIGITAL CAMERA

London’s three days of blistering heat had just begun, and so I walked from South Kensington station down to the river, where The Painted Heron is located. I was enjoying the fresh air so much thatI was overjoyed when the waitress didn’t keep me inside, butled me instead to their small and beautiful terrace.

The actual painted heron The actual painted heron… he was…

View original post 639 more words

Bee sting cake, could it get any more German than that?

Today was a great start to the weekend. Not only did I get to go to Hahndorf to see the Lilium Society’s show, I also tasted my first Bee sting cake. I also bought my first Calla lily and my first hoop petticoat daffodil bulbs but the Bee sting cake is really what I want to talk about. We went to the quaint little Cafe Assiette opposite the Hahndorf Memorial Institute. The institute is a rather ugly building compared to the charming German Arms Inn near by. The Cafe however was pure Hahndorf, with sandstone walls, uneven doors and a wealth of local culture and flavour.

We sat inside as there was no space in either of the outdoor areas and also because Indians are still not used to sitting outside when they go to a ‘restooraant’. Before finding a table we ordered an apple strudel and the Bee sting cake. For the three of us, we should have ordered three cakes as was soon apparent when we fell upon the cakes with our forks like kids home from boarding school.

Bee sting(Bee sting cake and strudel + two cappuccinos)


Once back home, I Googled (what else?) Bee sting cake and found that it had been created by German bakers who threw bee hives at marauders from a neighbouring village and celebrated their victory later with libations and honey cake. It might also have been named after the creator who topped the cake he had made from some left over sweet yeast dough with honey and was stung by a bee for his pains. Either way, it has a tinge of violence in its past that makes it strangely interesting to me. In German the cake is called Bienenstich or Bee Sting.

So, now you know. Bee sting or Bienenstich; because baking is not just a gentle art.

Local Hahndorf flavour
(Farm tools and a scythe – Poldark anyone?)


The seating inside the Cafe is very comfortable albeit a little crowded. The walls of both the eating area as well as the front room where customers have to place orders are decorated with agricultural implements and coffee sacks. I even spotted one from India that read Indian Coffee Allana Robusta. Made me happy because I am parochial like that.

Anyway, if you are in Adelaide or in Hahndorf, go and eat the Bee Sting cake at Cafe Assiette. You will not be disappointed.

Cafe-Assiette-in-Hahndorf-1024x529
(Photo from internet, because it was too crowded in Hahndorf today to try get a photo without people in it)

Oh, and the strudel was pretty amazing too!


Dimer Devil or Devilled Eggs

 debhil 3

 Deemer Devil!

Ingredients

4 eggs, boiled
2 medium sized boiled potatoes, mashed
200 gm minced meat
2 small onions (ground into paste)
1 tsp ginger paste
3 tsp garlic paste
2 tsp red chilli powder
3 tsp garam masala powder
1 tsp sugar
Salt to taste
2 eggs well beaten for coating
Bread crumbs from 3 slices of toasted bread
Mustard oil for cooking the onion, ginger, garlic and spice powders
White oil for deep frying

METHOD:

1) Heat mustard oil in a pan. Add onion paste and sauté till onion starts to change color. Add ginger and garlic paste.Then add the spices – red chilli powder, garam masala powder, sugar and salt. Stir well to mix in the spices. Cook till it is fragrant and onions are translucent.
2) Allow to cool. Then add the mutton keema and the mashed potato. Sprinkle extra garam masala powder on top. Mix by hand or with a fork.

debhil 1

Almost done! Ready to fry!

3) Take a egg sized amount of the mince and potato mixture in your palm. Place one boiled egg in it and gently mold around till the egg is not showing any more.

4) Dip in beaten egg, then in crumbs. Repeat step 4 for a thicker coating.

5) Heat white oil to a high temperature and fry the crumbed eggs.

debhil 2

That is what they should look like!

Enjoy! Continue reading

Strawberry Jam

Making your own jams has got to be one of the most rewarding things you do. Only do it with fruit that is in season, because that makes your ingredients cheaper. I have been making this strawberry jam for a few years now and it is the best way to bottle the summery taste of strawberries for the whole year. The jam is excellent on bread, magical on cakes and truly delicious as a topping when warmed and poured over vanilla bean ice cream.


Ingredients

1 kg fresh strawberries, hulled and halved

1 kg white sugar

juice of 2 large lemons, strained


Image

Method

Before starting the cooking, place a small glass saucer in the freezer. You will need this after the jam is ready.

Put the strawberries and sugar into a large, heavy-based stainless steel or enamel saucepan. Give the pan a shake so the sugar settles down into the berries. It is best not to make a large quantity if the pan is not large as spillage is very sticky and hard to clean. Pour the lemon juice over the top, cover the pan, and place over medium/low heat and warm the mixture, stirring gently until the sugar has dissolved. Increase the heat to high once the sugar melts and let the jam boil, stirring it to make sure it isn’t catching on the bottom, for between 15 and 20 minutes until its reached setting point. 

When the jam is close to setting point it bubbles up rather ferociously in the pan, so do keep an eye on it and lower the temperature a bit so it doesn’t boil over (you may well need to do this a few times.) 

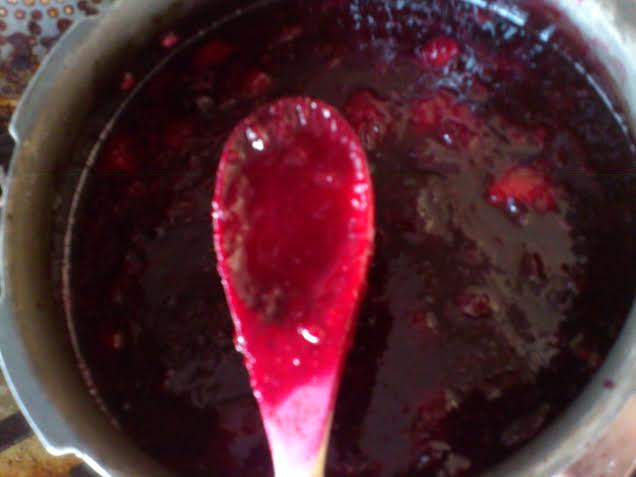
There are a few ways to check the setting point. Firstly, you can use a thermometer and check the temperature has reached 105 degrees Centigrade. The second method is to dip a wooden spoon into the boiling jam, then lift it up high above the pan and let the jam on it drip back in. What you’re hoping to see is those last few drops looking quite thick and syrupy, and ideally, falling as a ‘stream’ than individual drops.

You can also spoon a little jam on the ice-cold saucer from the freezer for a minute or so, then push your finger through it. If the surface wrinkles up a little, it’s ready. Keep testing the jam every minute of so, and as soon as it’s ready, take it off the heat and let it settle for a few minutes. Ladle it into hot, sterilised glass jars, cover them with a sheet of baking paper to protect them, and leave them to cool completely.

I sterilise jars and lids in the dishwasher on the hottest/longest cycle and let them stay in the dishwasher till I am ready to put the jam into them.

Enjoy!

Stuffed Chicken Thighs

My version of Mario Batali’s herb and cheese stuffed chicken thighs

 Image

YOU WILL NEED:

1 Tablespoon of oil

½ an onion diced

2 cloves of garlic crushed

1 medium eggplant diced

8 medium sized mushrooms diced

4 cups of chopped spinach and any herbs you like

1 ½ slices of wholemeal bread, shredded into small pieces

2 eggs beaten

250 gm of cheese, grated or cut into small pieces

Chilli flakes

4 chicken thighs, boned

Salt and pepper to season

 Image

YOU WILL HAVE TO DO:

Preheat your oven to 220 degrees. In a medium frypan, gently sauté the onion and garlic. Once the onion starts to look translucent, add the egg plant and mushroom cubes. After frying them for a while, add the chopped greens. I had Swiss chard, kale, dill, rocket, nasturtium leaves, parsley and chives in this mix. You can choose to add only spinach if that is what you like.

Image

I put a lid on the frypan and started preparing the chicken thighs for the stuffing. I had thighs that had not been boned and so I had to look at a video(https://stellaculinary.com/podcasts/video/how-to-debone-a-chicken-leg-and-thigh). Do please remember to do this before starting to cook! Once the thighs are ready, place them skin side down on a clean cutting board and season them with salt and pepper. Give each a beating with a mallet till they are flattened to double their size but do not break through the flesh.

Image

Now take the fry pan off the heat.  After the mixture is slightly cooled, stir in the eggs and the cheese through it. You will need roughly a quarter of the mixture to stuff each thigh. Place two bacon rashers on a plate and lay the flattened chicken thigh on them. Spoon the mixture of greens, eggs and cheese on it. Then you roll the chicken and bacon with the stuffing inside it. Tuck the loose ends of the rasher underneath.

I made sure that they would not open up during the cooking by sticking skewers through them which were removed once the thighs were cooked.

I cooked them on a foil covered tray for 40 minutes. Half way through I lowered the heat to 190 degrees C.


Serve with salad or roast potatoes for a lovely dinner. Your guests will think you made a lot of effort but this is actually quite easy to do. One could do this without the bacon or with a fillet of fish instead of chicken too!

My best ever Coffee Cake

Getting ingredients ready! Vanilla extract is a must for a real cake sensation!

Getting ingredients ready! Vanilla extract is a must for a real cake sensation!

Coffee Cake

YOU WILL NEED:

125 gm unsalted butter

1 Cup caster sugar

3 eggs

1 tsp vanilla essence

1 Tablespoon coffee powder

¾ Cup of plain flour

½ Cup of self raising flour

1/3 Cup of sour cream

Three free range eggs! Happy chickens lay better eggs.

Three free range eggs! Happy chickens lay better eggs.

YOU WILL HAVE TO DO:

Preheat the oven at 160 degrees Centigrade.

Grease and flour a small loaf tin or a pie dish

Cream butter and sugar together till the mixture is thick and frothy.

Add eggs one at a time, beating well after each addition

Add vanilla and coffee. Beat well till blended.

Now add the flours alternating with the sour cream, folding in carefully between each addition.

Fold in till combined lightly. A light hand is vital to the success of the cake.

After the coffee is added, it should look like this.

After the coffee is added, it should look like this.

folding in with a spoon helps keep the cake light

folding in with a spoon helps keep the cake light

Spoon into the prepared tin and bake for 30 to 40 minutes or until a skewer poked into the middle of the cake comes out clean.

Set aside for 5 minutes.

By the way, the batter tastes exactly like Cookies and Cream ice cream! So leave a bit in the mixing bowl for your children to lick clean!

Folding in the sour cream almost done, which means it is oven time!

Folding in the sour cream almost done, which means it is oven time!

The cake keeps well too, if you can keep the family under control! A week in a airtight container and up to a month if frozen as individual slices for lunchboxes.

Nice coffee colour, all it needs is a cuppa to go with it.

Nice coffee colour, all it needs is a cuppa to go with it.

Scrambled eggs…and a few extras..

Sunday is one of the days when I can make breakfast for the family. Often, because it is Sunday, this becomes a lazy brunch. And there is nothing like a lazy brunch with scrambled eggs. Especially when there are things like smoked salmon and grilled tomatoes and mushrooms to go with the eggs. Topped with micro greens, chives, flat leaf parsley and garlic shoots from the garden…a delight to the eyes and the taste buds.


Image

Parsley on the right and chives and microgreens on the left of the much used cutting board


Image

The mushrooms were just past their prime..


YOU WILL NEED:

(For 2 people)

For the mushrooms and tomatoes:

2 teaspoons olive oil

1 cup mushrooms of your choice (shitake would have been great but any mushroom will do at a pinch), chopped

2 tomatoes, quartered

1 garlic clove, minced

2 tablespoons fresh parsley, finely chopped

Salt and pepper to taste

For the eggs:

4 large eggs

2 tablespoons sour cream

Half a cup of grated Cheddar or any cheese you like

1 teaspoon butter

Salt and pepper to taste

lots and lots of chives and baby greens


Image

The tomatoes look ready..


YOU WILL HAVE TO DO:

In a large skillet, heat the olive oil over medium heat and cook the mushrooms, with the garlic, until the mushrooms are just beginning to soften. Push them to the side, add the tomatoes add the parsley and toss with a wooden spoon. Try not to burn the garlic or it will become really bitter.

Image

Whisked eggs with added greenery and cheese


Crack the eggs over a medium bowl and scramble them a few times with a fork. Mix in the sour cream. Season with salt and pepper. In a separate frypan, heat the butter over medium heat, add the scrambled eggs and gently stir them with a wooden spoon as they cook. I cook them till they are almost set in large curds. Turn the heat off as the eggs will keep cooking in the residual heat.


Image

Egg mix in frypan..golden good!


Serve the scrambled eggs over fresh or toasted bread and spoon a generous amount of the tomato and mushroom mix over each slice.

Image

Tomatoes on plate


Image

Eggs on plate


Another good thing to add would be crispy bacon!

Bon Appetit!

Banana Cake

YOU WILL NEED:

125 gm butter

1 and a half Cups of sugar

2 teaspoons of vanilla essence

2 eggs

4 over ripe bananas, mashed

3 Cups of self raising flour

1 Cup of milk

YOU WILL HAVE TO DO

1.Heat butter, sugar and vanilla essence in a pan. This saves you from having to cream them by hand.

2.Remove from and allow to cool before adding the eggs and beating well.

3.Add the bananas, flour and milk in three batches. Mix well.

4. Bake in a greased cake tin for 35 minutes at 170 degrees.

You may want to top this and make it a special cake by making the following cream cheese frosting. My family did not want to wait that long for the cake to cool!

My cake went a little too brown because I had to do the dishes as I waited. Not doing that next time.

cake banana

CREAM CHEESE FROSTING

125 gm of cream cheese, room temperature

250 gm of icing sugar mixture

50 gm unsalted butter/margarine,  room temperature

1 and half Tablespoons of milk

Blend using a fork or an electric blender. Spread on cooled cake with a spatula or a knife.

Enjoy!! The moist cake and the crumbly outsides are great!

cake piece   cake gone

A piece!                                                              All gone!

No Bake Lemony Cheesecake

YOU WILL NEED:

Image


250 gm of sweet biscuits

125 gm of unsalted butter

375 gm of cream cheese

2 teaspoons of vanilla essence

Zest of one lemon

1/3rd Cup of lemon juice

1 tin of condensed milk


YOU WILL HAVE TO DO:

Crush biscuits in a plastic bag with a rolling pin or in a food processor till fine.  I could not be bothered with taking out the food processor so I gave both my arms and my pet peeves a workout by crushing all the biscuits by hand. It was very satisfying once I got a rhythm going. It did take me the longest out of all the steps. About ten minutes.

Combine with melted butter. I melted this in a bowl for about 45 seconds in the microwave oven. Do be careful if using a glass or ceramic container, it does get quite hot to the touch.

Once the biscuits and the butter were looking like damp breadcrumbs, I pressed them  into the base of a spring form cake tin lined with cling wrap to help in removing from the tin later.

Use a glass to smooth the base down and pack it tightly. Now chill for ten to fifteen minutes. This will give you ample time to get on with the rest of the stuff.


Image

Zest two lemons. This means removing tiny particles of the yellow rind and not the bitter white skin underneath that. This will give a burst of lemony goodness to the filling of the cheese cake.

Soften cream cheese in the microwave oven for about 25 seconds. Place in a large bowl with sides that you can scrape down easily. Use a stick beater to beat the cream cheese till soft. Now add the lemon zest, the 1/3rd cups of lemon juice and a tin of condensed milk gradually. Beat well till smooth.

Now take the cooled base out of the fridge and pour the filling into the crust. Smooth with a spatula and give the base a tap to get rid of air bubbles. Refrigerate overnight or for at least 5 hours.

Image


Image